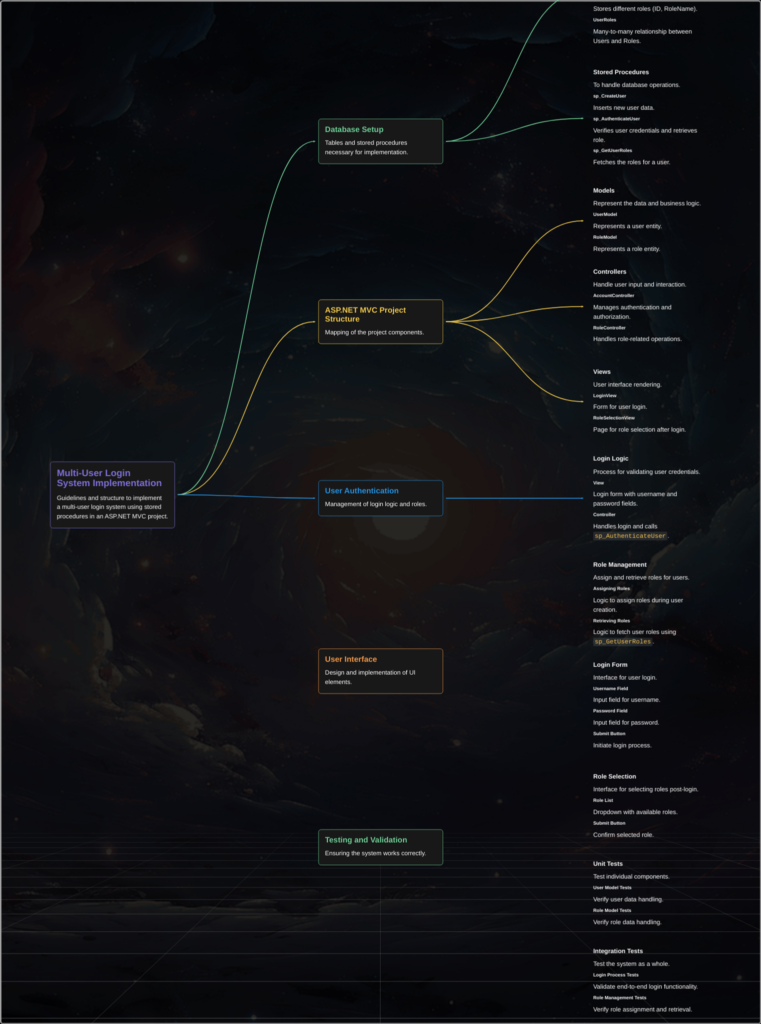
Follow these steps to set up a multi-user login system in ASP.NET MVC utilizing stored procedures, with user roles such as “Student,” “Teacher,” “Staff,” “Admin,” and “SuperAdmin.”
Step 1: Set Up the Database
Create a SQL Server Database:
Open SQL Server Management Studio (SSMS).
Create a new database named UserManagementDB.
Create a Users Table:
Execute the following SQL script to create a table for storing user credentials and roles:
sql
CREATE TABLE Users (
UserId INT PRIMARY KEY IDENTITY(1,1),
Username VARCHAR(50) NOT NULL,
Password VARCHAR(50) NOT NULL,
Role VARCHAR(20) NOT NULL
);
Insert Sample Data:
Add some sample users with different roles:
sql
INSERT INTO Users (Username, Password, Role) VALUES
(‘student1’, ‘password1’, ‘Student’),
(‘teacher1’, ‘password2’, ‘Teacher’),
(‘staff1’, ‘password3’, ‘Staff’),
(‘admin1’, ‘password4’, ‘Admin’),
(‘superadmin1’, ‘password5’, ‘SuperAdmin’);
Create a Stored Procedure:
Create a stored procedure to validate user credentials:
sql
CREATE PROCEDURE ValidateUserLogin
@Username VARCHAR(50),
@Password VARCHAR(50)
AS
BEGIN
SET NOCOUNT ON;
SELECT Role FROM Users
WHERE Username = @Username AND Password = @Password;
END
Step 2: Create the ASP.NET MVC Project
Open Visual Studio.
Create a new ASP.NET MVC project:
Go to File > New > Project.
Select ASP.NET Web Application and name your project (e.g., MultiUserLoginApp).
Choose the MVC template and click OK.
Step 3: Create the Model
Create a Model Class:
In the Models folder, create a new class named LoginModel.cs:
csharp
public class LoginModel
{
public string Username { get; set; }
public string Password { get; set; }
public string Role { get; set; }
}
Step 4: Create the Controller
Create a Controller:
Right-click on the Controllers folder and add a new controller named AccountController.cs:
csharp
using System;
using System.Data;
using System.Data.SqlClient;
using System.Web.Mvc;
using YourNamespace.Models; // Update with your actual namespace
public class AccountController : Controller
{
private string connectionString = “YourConnectionStringHere”; // Update with your connection string
public ActionResult Login()
{
return View();
}
[HttpPost]
public ActionResult Login(LoginModel model)
{
if (ModelState.IsValid)
{
using (SqlConnection conn = new SqlConnection(connectionString))
{
SqlCommand cmd = new SqlCommand(“ValidateUserLogin”, conn);
cmd.CommandType = CommandType.StoredProcedure;
cmd.Parameters.AddWithValue(“@Username”, model.Username);
cmd.Parameters.AddWithValue(“@Password”, model.Password);
conn.Open();
var role = cmd.ExecuteScalar() as string;
if (!string.IsNullOrEmpty(role))
{
// User is valid, set role in session
Session[“Username”] = model.Username;
Session[“Role”] = role;
// Redirect based on role
switch (role)
{
case “Student”:
return RedirectToAction(“StudentDashboard”, “Home”);
case “Teacher”:
return RedirectToAction(“TeacherDashboard”, “Home”);
case “Staff”:
return RedirectToAction(“StaffDashboard”, “Home”);
case “Admin”:
return RedirectToAction(“AdminDashboard”, “Home”);
case “SuperAdmin”:
return RedirectToAction(“SuperAdminDashboard”, “Home”);
}
}
else
{
ModelState.AddModelError(“”, “Invalid username or password.”);
}
}
}
return View(model);
}
public ActionResult Logout()
{
Session.Clear(); // Clear session
return RedirectToAction(“Login”);
}
}
Step 5: Create the Login View
Create the Login View:
Right-click on the Login action in AccountController and select Add View.
Name the view Login.cshtml.
xml
@model YourNamespace.Models.LoginModel
@{
ViewBag.Title = “Login”;
}
<h2>Login</h2>
@using (Html.BeginForm())
{
@Html.AntiForgeryToken()
<div>
@Html.LabelFor(m => m.Username)
@Html.TextBoxFor(m => m.Username)
@Html.ValidationMessageFor(m => m.Username)
</div>
<div>
@Html.LabelFor(m => m.Password)
@Html.PasswordFor(m => m.Password)
@Html.ValidationMessageFor(m => m.Password)
</div>
<div>
<input type=”submit” value=”Login” />
</div>
}
Step 6: Create Dashboard Views
Create Dashboard Views for Each Role:
Create separate views for each role’s dashboard (e.g., StudentDashboard.cshtml, TeacherDashboard.cshtml, etc.) in the Views/Home folder.
Example for StudentDashboard.cshtml:
xml
@{
ViewBag.Title = “Student Dashboard”;
}
<h2>Welcome to the Student Dashboard</h2>
Repeat similarly for other roles.
Step 7: Configure the Connection String
Update Connection String:
Open Web.config and add your connection string inside the <connectionStrings> section:
xml
<connectionStrings>
<add name=”DefaultConnection” connectionString=”Data Source=YOUR_SERVER;Initial Catalog=UserManagementDB;Integrated Security=True” providerName=”System.Data.SqlClient” />
</connectionStrings>
Update the connectionString variable in the AccountController to use this connection string:
csharp
private string connectionString = ConfigurationManager.ConnectionStrings[“DefaultConnection”].ConnectionString;
Step 8: Run Your Application
Start the Application:
Press F5 to run your application.
Navigate to /Account/Login to access the login page.
Enter the credentials for any user you added to the database and log in.

Conclusion
This post walks you through the entire process of creating a multi-user login system in ASP.NET MVC with stored procedures. Users can log in as “Student,” “Teacher,” “Staff,” “Admin,” or “SuperAdmin,” and will be directed to their appropriate dashboards based on their roles. You may improve this implementation by including features like password hashing, user registration, and error handling.


